Protect
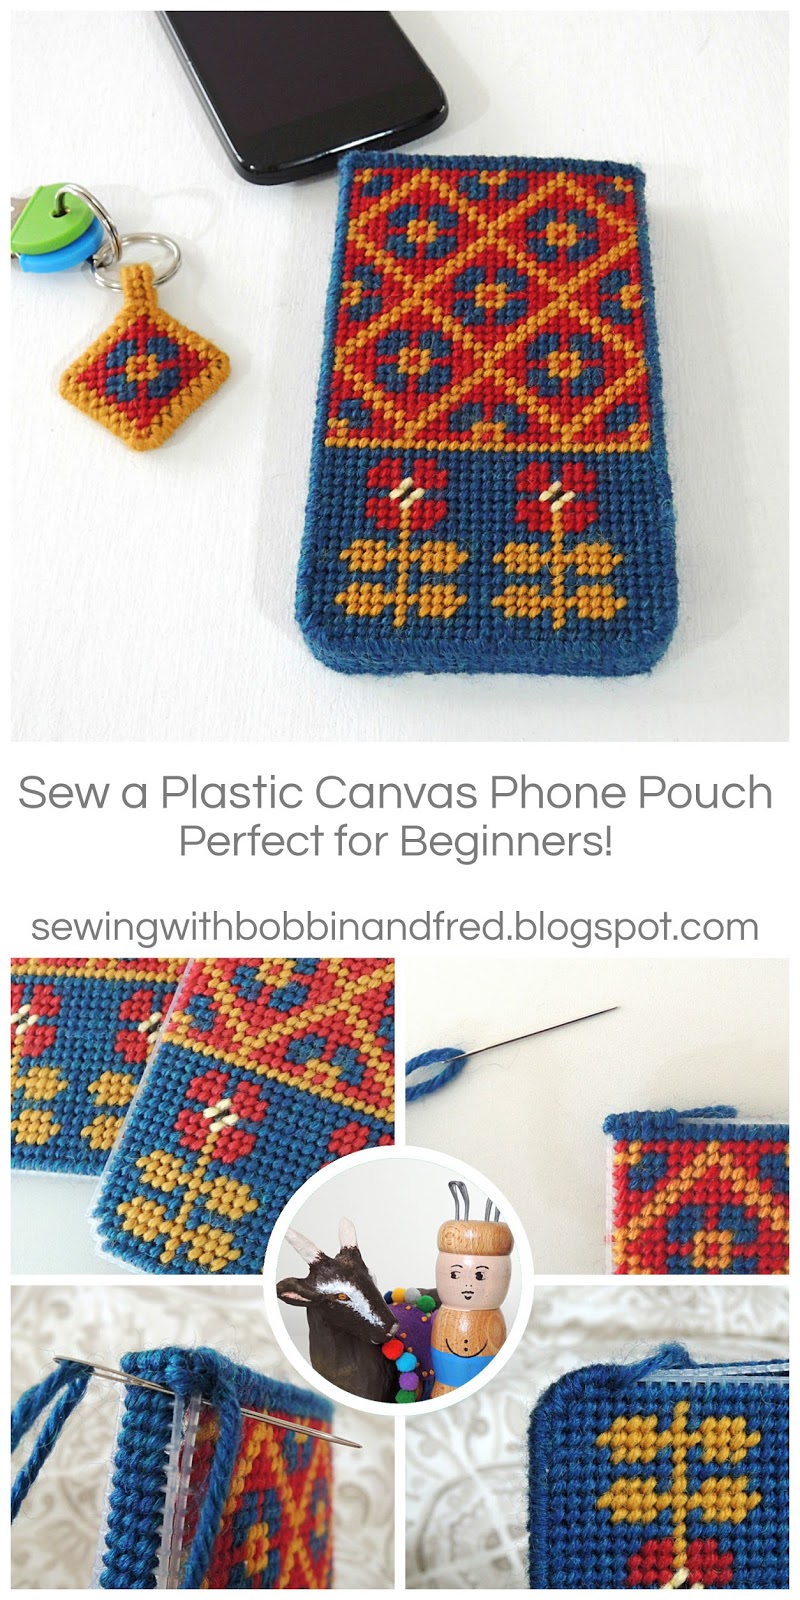
your phone with this cute Fair Isle Tent Stitch Pouch. It's sturdy,
hard-wearing and even splash proof! There really is no greater way for a
stitcher to look after their device. Stay true to the pattern and
recreate the one I made or personalise it with your favourite colours.
When I first discovered plastic canvas projects it was with a mixture of horror and delight. Horror at the
very dated projects out there and delight at the forms and shapes that can easily be created without all the faff of fabrics. It is awesome for 3D embroidery!
very dated projects out there and delight at the forms and shapes that can easily be created without all the faff of fabrics. It is awesome for 3D embroidery!
The other attraction is that an entire plastic canvas project can be sewn anywhere. That's really handy for someone like me who's mostly restricted to bed. Don't worry though, you don't have to make like a 50s housewife and sew in your bed too, you can make this wherever you like.
Sew it on your lunch break or on your daily commute, in front of the telly or even by the pool on your holidays, you name it, you can sew it there...maybe not in the bath...but hey, the heart wants what the heart wants and maybe you can make that work in a way that I never could.
Plastic canvas is really quick and easy to sew and you can learn the best way to tent stitch for a super neat front and back with full coverage on Bobbin and Fred's Stitch SOS post: How to Tent Stitch on Plastic Canvas
If you do it right the inside of your phone pouch will look like this one does...check out that gorgeous little sliver at the opening to see what I'm talking about.
Woah! Fred (the goat) just swooned a little. He's a sucker for a beautiful finish.
Now you know how to tent stitch, let's get down to business. I bought a new phone and wanted a durable yet stylish cover I could make myself. Me and Bobbin were eying up fair isle designs in Mary Jane Mucklestone's book 150 Scandinavian Motifs and my wool stash when inspiration struck! And this is what we came up with...
Cute, right?
Want to make your own? Brilliant! Read on...
This pattern will make a pouch that will fit a 5.11x2.59x0.46" phone. It fits my Moto G perfectly. You could easily scale it up by drawing around your phone and continuing the repeat pattern.
You Will Need:
1x 10.5x13.5" sheet of 10 Count Plastic Canvas
DK yarn (worsted if you're in the US) in 5 colours. I used Drops Karisma in Petrol (73), Dark Mustard (52) and Wine Red (48)
Anchor Tapestry Wool shades 7078 and 7538 for the center of the flowers
Anchor Tapestry Wool shades 7078 and 7538 for the center of the flowers
Craft scissors
Instructions
1. Cut the canvas taking care to ensure all the edges are all straight and smooth. Cut corners in the diagonal taking care not to cut too close. Follow the stitch chart for the front and back of the phone pouch.
2. Cut a 13.5" length three stitches wide and tent stitch the entire length. This is will become the side of your pouch. You should now have a front, back and side.
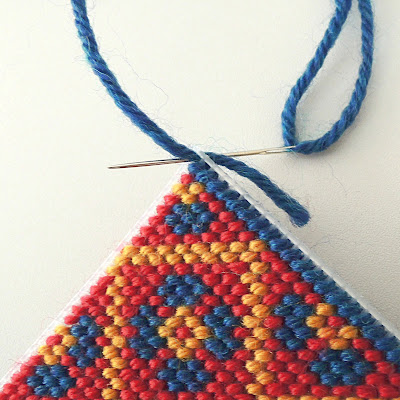
3. Now it's time to cover the top edges of the front and back panels and the short ends of the side strip with over cast stitch. All you do is push your needle from the back to the front through the first hole in the top row.
4. Push your needle through both corner holes three times and use your finger to spread the wool so it completely covers the plastic.
5. Continue stitching along the row, pushing your needle through each hole twice. Make sure your stitches encase the end of the thread so it doesn't come undone. It should look a little something like this...
6. After you've over cast stitched all the edges it's time to construct the pouch. It's a bit fiddly to start with but bare with me...
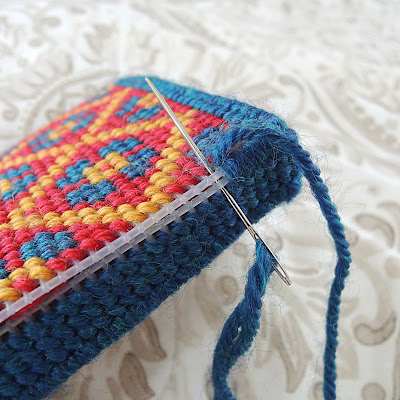
Anchor your thread into the backs of the stitches at the top of the side piece. Then hold the side to the edge of the front piece at a right angle. Join the two edges together by over cast stitching as you did before, this time passing through the top hole of the side and the top hole of the front.
8. At the corners, wrap the side around and continue sewing. The right-hand side will look slightly different to the left due to the direction the tent stitch runs in. Sew through all of the holes on the front that have been sewn and all of the holes on the side, you should expect to pass your needle through some holes more than twice to work round the corner and ensure all the canvas is completely covered.
10. Keep sewing until you reach the top of the other side of the front. Then repeat Steps 6-10 to attach the back panel to the other side.
11. Spray your phone cover with the Fabric Waterproofing Spray as per the instructions on the can and bam! your phone pouch is complete and ready for use a.k.a show off to your mates!
I really hope you've enjoyed making this project as much as I did. Mum's got a new phone and has asked for a cover so I'm going to design another one for her. I'll be sure to share it with you all!
If the matching keyring's caught your eye, you'll be glad to know I'll be showing you how to make that soon. Follow along by email so you don't miss out.
Bobbin's Design Tip: You can make this in any colourway you fancy! If you're not colour confident try swapping the shade of primary colours (red, yellow and blue) to shades of tertiary (purple, orange and green).
Bobbin's Design Tip: You can make this in any colourway you fancy! If you're not colour confident try swapping the shade of primary colours (red, yellow and blue) to shades of tertiary (purple, orange and green).


This is the coolest plastic canvas project I've seen! I love Fair Isle patterns and I've never seen someone adapt one like this before. Pinning!!
ReplyDeleteThank you so much, Natasha! I'm so, so pleased you like it, your comment's made my day :) I've got more plastic canvas projects up my sleeve...I'm looking forward to sharing them with you soon. Have a lovely day xo
DeleteVery clever----and cute!!
ReplyDeleteThank you, Texas Stitcher, really pleased you like it :-D
DeleteMe ha encantado! Muchas gracias por explicarlo paso a paso.....Ya quiero hacerlo, me parece que hasta un bolso quedaría muy lindo ...Un abrazo
ReplyDelete¡Muchas gracias, María. Estoy tan contento de que te guste. Grandes mentes piensan igual, tengo un tutorial de bolsa pronto!
DeleteFound you through Nuts About Needlepoint. I love this and can't wait to see more about plastic canvas.
ReplyDeleteAwesome! I enjoy Nuts About Needlepoint too. Thank you, I'm really pleased you like it. I think plastic canvas has so much potential so I'm excited about exploring it and sharing the results with you :)
Delete