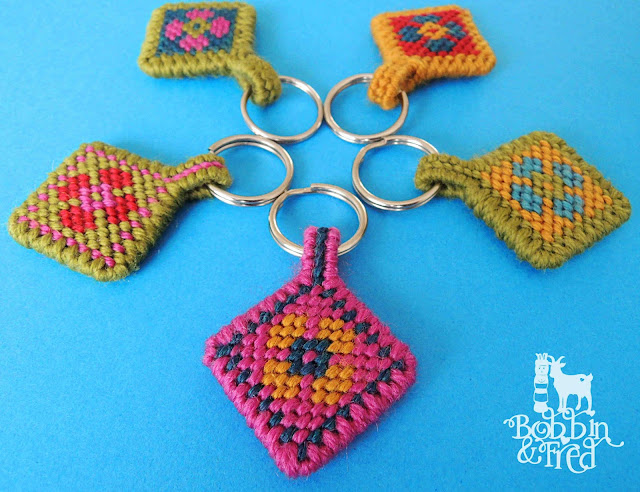
Carry a little flower power in your pocket wherever you go.
These super cute keyrings are fun, quick and cheap to make. If you're new to needlepoint tapestry they're a great project to start with! If you're already a plastic canvas addict they're a great way to use up scraps of yarn and small pieces of plastic canvas leftover from other projects.
Materials
These super cute keyrings are fun, quick and cheap to make. If you're new to needlepoint tapestry they're a great project to start with! If you're already a plastic canvas addict they're a great way to use up scraps of yarn and small pieces of plastic canvas leftover from other projects.
Materials
10ct plastic canvas (at least 17x43 threads in size)
DK yarn in 3 colours
DK yarn in 3 colours
Craft scissors
Size 22 tapestry needle
Split ring keyring
Pliers
Process - click on the pictures to make them bigger.
1. Gather supplies and tent stitch the chart. Learn how over on my post How To Tent Stitch on Plastic Canvas.
2. Cut around the outside of the design. Cut corners on the diagonal but don't cut too close otherwise you'll weaken the canvas and may break it when you overcast stitch the edges. The vertical edges should be smooth of any nubs..

Fred's Top Tip
Shannan cut a little too close on the diagonal edges. If you're worried about doing the same cut them along the straight edges rather than on the diagonal.
3. Overcast stitch the raw vertical edges. Learn how over on my post How to Overcast Stitch on Plastic Canvas. Pass the needle through each hole twice.
4. Fold the keyring in half and line up the two sides. Overcast stitch around the outside edge. Pass the needle through each hole two times and three times on the corners. Stitch both sets of holes, the ones the needle's passing through in the photo below on the right...
...and, the ones the needle's passing through in the photo below on the left.
5. When you've gone the whole way round weave the needle under the stitches to end.
5. When you've gone the whole way round weave the needle under the stitches to end.
6. Pull the thread right the way through and trim it close the stitches to finish. You may need pliers to pull the needle through.
7. Thread a split ring keyring through the loop to finish.
8. Experiment with different colourways and give them to your friends to spread the peace and love.
Spread the peace and love by making my flower power keyrings for yourself and all your friends.
If you'd like to share the ones you make with me, Bobbin and Fred, we'd love to see! Email your photos to bobbinandfred @ hotmail dot com or tag me on instagram @bobbinandfred or #bobbinandfred.
If you'd like to sell what you make please stick to the terms below and let me know so I can help advertise your shop 😀
Selling what you make:
- The items must be made by hand, no mass production.
- Online listings must contain a direct link to where the pattern's found on Sewing with Bobbin and Fred.
- Credit must be given to Sewing With Bobbin and Fred as the pattern designer on a tag affixed to each item.
- You may alter the pattern but all terms still apply.
Make a matching phone case too! Check out my tutorial, DIY: Plastic Canvas Phone Pouch to find out how.
Would you like our sewing adventures, hot hand stitch trends and much more delivered to your inbox? Sign up to our newsletter!
I can't promise it'll be weekly but I can promise you won't regret it.
Have a fab, floss-filled week!
Would you like our sewing adventures, hot hand stitch trends and much more delivered to your inbox? Sign up to our newsletter!
I can't promise it'll be weekly but I can promise you won't regret it.
Have a fab, floss-filled week!
Happy Stitching,
Shannan, Bobbin and Fred xX


This is so cute. I love it! The whole blog is looking amazing. Fiona x
ReplyDeleteThank you so much, Fiona xo I'm so pleased you like them and the rest of my blog. If you give them a go, I'd love to see your results :D
DeleteReally cute. Love the pattern. Really into all the crochet DIY tutorial you have shared.
ReplyDeleteThank you so much, Joanna, that's really lovely to hear. I'd love to see yours if you give them a go xo
Delete