


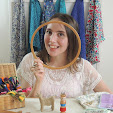
Do you enjoy finding ways to wear your needlepoint as much as I do? The Millefleur Satchel came about because I was looking at how I could accessorise my outfits with hand stitch so I could carry a piece of my passion with me wherever I go, and now you can too!
I’ve teamed mine with a chunky jumper, casual skirt, leggings and ankle boots for the kind of preppy boho look I favour. This cute satchel is the perfect size for your purse, keys, and phone, and even some little extras...lipstick comes to mind.
What's more, it’s entirely handsewn. And, even better, it’s easy to stitch!
Really!
To make a Millefleur Satchel you'll only need to know how to overcast stitch (I recently saw this being called binding stitch), tent stitch and backstitch. If this isn't your first rodeo you probably know these stitches already but if you’re a complete newbie, they’re easy to master and this shouldn’t hold you back. You can learn while you make this satchel and by the time you've slung it over your shoulder you'll be a pro.

I'm in love with the spring palette I made mine with using Stylecraft Chunky in Storm Blue, Gold, Denim, Parchment, Raspberry and Plum, but this design will look beautiful in any 6 colours of your choice. There’s 39 in the Stylecraft Special Chunky range to choose from or you can substitute for any chunky yarn or two strands of DK. You’ll only need a small amount of most shades which makes this a great stash-buster project!
The vast majority of the Millefleur Satchel is completed in tent stitch. Using this stitch means the bag is self-lining and the stitching looks almost as beautiful inside as it does out! Have a read of my tutorial, How to Tent Stitch, if you need to brush up on this technique.

I found through trial and error that the best way to work the stitches for this design is by working them in vertical rows up and down rather than left to right. I also found that stitching the elements of the design in a certain order also improved the finish I was able to get. I got the best results by stitching the Storm Blue background first, then the hexagons, then the flowers and finally the smaller details.
I delight in making the inside as neat as the front but that is just me and one of the things I love about making things by hand but I know that it isn’t important to lots of other stitchers and it doesn’t have to be. So, if you’re rolling your eyes thinking I’m mental, that’s alright! I’m just enjoying myself and hope you'll do the same.
Regardless of how you stitch, you’ll end up with a beautiful satchel you enjoyed making and that you love to use and that’s the most important thing. Another way to tackle the lining could be to back the needlepointed pieces with felt before joining them together or to stitch the charts onto interlock canvas and send them to a finisher to make up for you.

The satchel has some cute hidden design details you’ll find when you open it up along with an inside pocket to slide small bits and bobs in to. It’s fastened with a magnetic snap clasp and has chunky D rings securing the buckle strap to the body, lending the satchel a professional touch.
It’s made using soft plastic canvas which makes it easy to finish and means it holds its shape without any tricky additions like interlining. It does mean you’ll want to be careful with it, don’t overfill or try to stretch this bag to the limits as it won’t give in the same way fabric would. However, you could swap the plastic canvas for interlock canvas instead. I’m looking forward to having a go at this next myself and will post an update when I have.

Would you like to make your own Millefleur Satchel? The project tutorial is out right now! The full tutorial and charts are featured in the March/April issue of Needlepoint Now and you can grab your copy here right now or enter to win one. I’m giving away two copies of this issue, one on Instagram and one via my newsletter. Keep your eyes peeled for details on how to enter. UPDATE: Giveaway now closed.
For those in the UK and elsewhere in the world without access to Needlepoint Now, please follow along and you'll be the first to hear of this pattern's general release. Please bear with me, it's a work in progress.
If you’d like to get started straight away and order the materials, you can.
You will need:
* Three sheets of soft 7ct plastic canvas, at least 27x34.5cm (10½x13½in)
* Stylecraft Special Chunky yarn: 125g of Storm Blue, 25g Gold, 15g Denim, 25g Parchment, 70g Raspberry and 25g Plum.
* Two 30mm (1¼in) silver D rings
* One 25mm (1in) silver oblong buckle
* Size 22 tapestry needle
* Permanent marker
* Pliers
* Craft scissors
* Polyester sewing thread to match the Storm Blue yarn
* General sewing needle
* Craft knife
* Cutting board
* 19mm (¾in) magnetic snap clasp
* Mini binder clip
* 19mm (¾in) magnetic snap clasp
* Mini binder clip
I hope you love this project as much as I enjoyed designing and making it. If you choose to have a go at making a Millefleur Satchel or it inspires you to make something else, I'd love to see! Share your makes with me, Bobbin and Fred via email (bobbinandfred @ hotmail .com) or tag us on Instagram using @bobbinandfred and #bobbinandfred.

Did you enjoy this post? Sign up to my newsletter to get more hand stitched goodness delivered directly to your inbox. I can't promise it'll be weekly but I can promise it'll be a delicious dose of floss-filled fun.
Until next time, happy needlepointing!
Shannan, Bobbin and Fred xX


No comments